***Note: Users may require Local Administrative Privileges in order to successfully export the certificate. ***
STEP 1
Place the exported certificate onto the desktop of the machine it is to be installed on.
STEP 2
Double click the exported file.
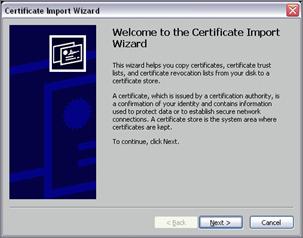
The Certificate Import Wizard window will start.
Click the Next button.
***You can also right click the exported file
and select Install PFX from the pop-up menu
that appears.***
STEP 3
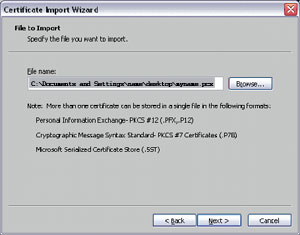
The file name field should show the certificate that was exported. If not, click the Browse button and locate the exported file.
Click the Next button to continue.
STEP 4
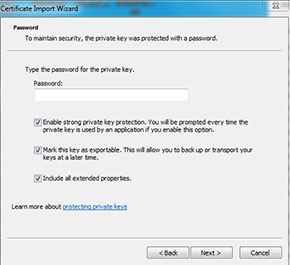
Enter the password you typed in Step 7 of the Export Instructions. Make sure you select "Enable strong private key protection", "Mark this key as exportable", and "Include all extended properties".
Click the Next button.
STEP 5
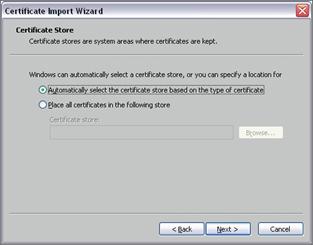
Select "Automatically select the certificate store based on the type of certificate."
Click the Next button.
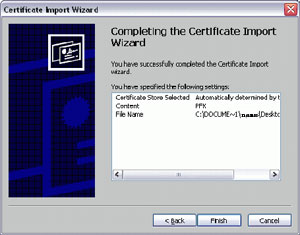
STEP 6
Click the Finish button.
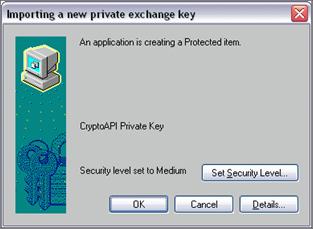
STEP 7
Set security level screen will appear.
Click on the Set Security Level button.
***SECURITY LEVEL MUST BE CHANGED
FROM MEDIUM TO HIGH.***
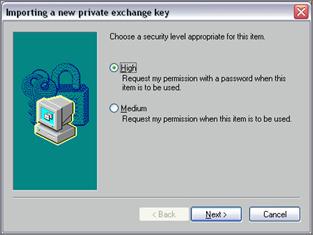
STEP 8
Change the Security Level to High.
Click the Next button.
***SECURITY LEVEL MUST BE CHANGED
FROM MEDIUM TO HIGH.***
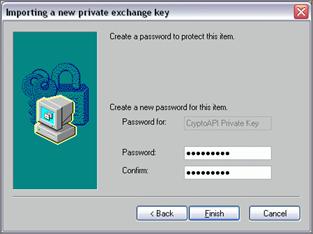
STEP 9
You will be prompted to create a password for your certificate.
***A password must be at least 8 characters long and contain a combination of at least 3 of the following characters: uppercase letters, lowercase letters, numbers, symbols***
Re-key your password for confirmation.
Click Finish.
STEP 10
The next window should show the Security Level is now set to High.
Click the OK button.
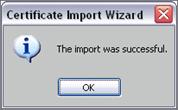
STEP 11
A message should appear saying that the import was successful.
STEP 12
Delete the exported cert from the desktop or move it to a known secure location.
STEP 13
Log onto KnowledgeNow by launching an Internet Explorer browser window and going to https://www.knowledgenow.com
HelpDesk/Customer Service call the Member 800 Number, option 1
or e-mail helpdesk@mib.com